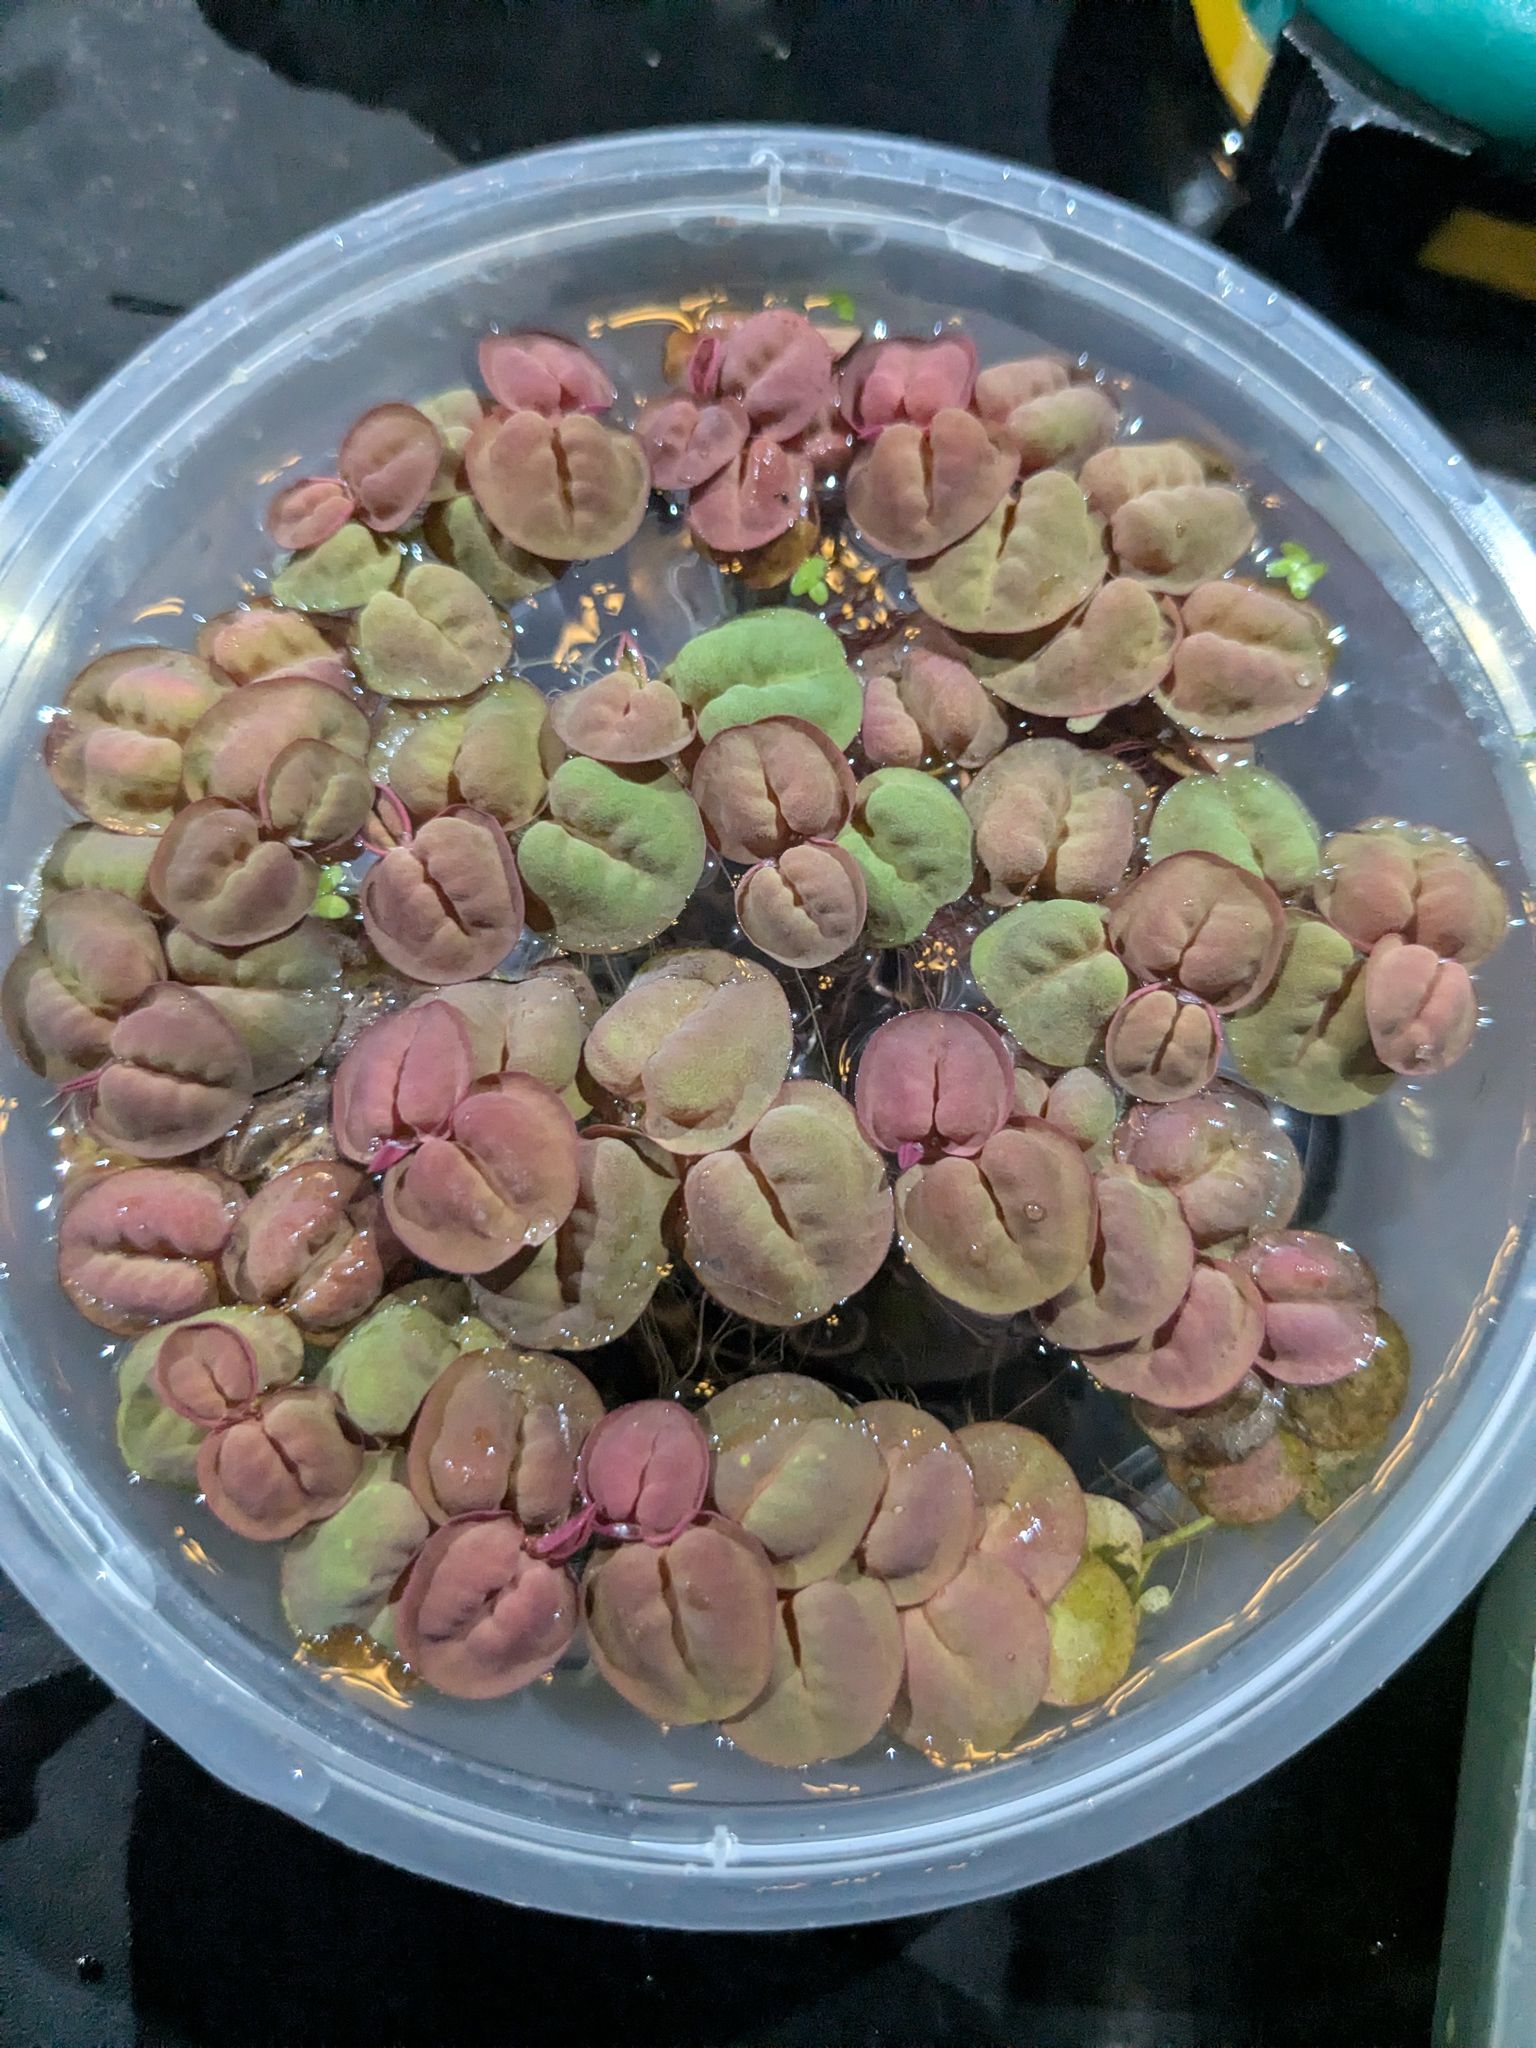

How to Plant and Propagate Red Root Floater in a Freshwater Aquarium
Red Root Floater (Phyllanthus fluitans) is a small floating rosette plant prized for its rosy-red top leaves and dangling reddish roots, but keeping that color and multiplying the colony takes a specific setup. This guide walks through introducing it correctly, dialing in light and flow, and separating daughter plants to grow your coverage.
What Red Root Floater Needs to Thrive
Red Root Floater grows as a small rosette of round, waxy leaves that sit on the water's surface, with fine, fuzzy reddish roots trailing underneath. Under the right conditions the tops of the leaves flush deep red or pink; under weaker conditions the plant stays green and grows more slowly.
| Parameter | Range |
|---|---|
| Tank size | Anything from a 5-gallon (19 L) bowl up to large display tanks |
| Water temperature | 72–82°F (22–28°C) |
| pH | 6.0–7.5 |
| Water hardness | Soft to moderately hard (0–12 GH) |
| Lighting | Moderate to high intensity, 6–8+ hours/day |
| Surface flow | Gentle to still only |
Because it draws nutrients straight from the water column rather than through roots in substrate, tank size matters less than surface conditions. It does, however, need a lid or a low enough water level to leave humid air above the leaves — Red Root Floater struggles in a fully open-top tank with dry room air passing over it.
Lighting: The Key to Red Color
Light intensity is the single biggest factor separating a green, stunted colony from a deep-red, thriving one. Low light will keep the plant alive, but it typically stays green and grows slowly. To trigger the red pigmentation, aim for:
- Moderate to high intensity full-spectrum LED lighting
- 6–8+ hours per day of that intensity
- A light source positioned close enough to the surface that it actually reaches the floating leaves — a fixture aimed straight down through several inches of water to light substrate plants may not deliver enough intensity at the surface itself
If you're shopping for a fixture, a compact LED aquarium light mounted low over the water, rather than a substrate-focused unit mounted high above a deep tank, tends to give floaters better results.
One caution: if a lid traps heat as well as humidity, a hot-running fixture positioned close to the surface can overheat the leaves sitting directly beneath it. Leave a little air gap or crack the lid slightly if you notice leaves near the light looking scorched or bleached rather than simply reddening.
Water Flow and Containment
Red Root Floater needs a calm surface. Strong filter output, an air stone breaking the surface, or general agitation can flip the rosettes over, shred the fragile roots, and trigger melt. To keep it stable:
- Position the colony away from filter outflow and intake
- Use a baffle or sponge over the filter outlet to diffuse current
- Float the plant in a calmer corner of the tank, away from powerheads or air stones
- Add a floating plant ring or frame (an airline tubing loop, a suction-cup ring, or a plastic frame) to keep the colony contained in that calm zone, prevent it from drifting into intakes, and make harvesting easier later
A ring also helps you leave open water elsewhere, which matters once the colony starts multiplying.
How to Plant Red Root Floater
- Acclimate slowly. Use a drip method or a float-and-mix approach to match the plant's transport water to your tank's temperature and chemistry gradually. Avoid dumping the stagnant transport water directly into the tank.
- Release gently onto the surface. Set the rosettes down rather than dropping them from height.
- Position away from flow. Place the colony in the calm zone you've identified, ideally inside a containment ring.
- Dose fertilizer. Add a liquid fertilizer with both macro- and micronutrients, since the plant will lean on the water column for everything it needs.
- Close the lid most of the way. Keep humidity around the leaves without sealing off gas exchange completely.
Expect some yellowing or melting of the outer, older leaves for the first 1–2 weeks after introduction. This is a normal transition response to changed water and light conditions, not a sign of failure — resist the urge to panic-dose fertilizer or change your lighting during this window. New, healthier red growth should appear as the plant settles in.
Fertilizer and CO2: What's Actually Needed
Because Red Root Floater absorbs nutrients directly from the water rather than through substrate roots, its fertilizer needs vary a lot by tank type:
- Heavily stocked or dirted tanks often generate enough dissolved nutrients from fish waste and soil breakdown that little or no extra dosing is needed.
- Lightly stocked or low-nutrient tanks usually need supplemental liquid fertilizer, particularly iron and potassium, which drive red coloration and prevent yellowing or holes in the leaves.
CO2 is not required. It's an optional enhancement — in high-light, high-tech tanks, added CO2 can accelerate growth and intensify red color, but plenty of hobbyists get good color and growth without it.
Low-Tech Tanks and Walstad-Style (Dirted) Setups
Red Root Floater is a favorite for low-tech, no-CO2 tanks precisely because it doesn't need substrate fertilizer and tolerates a fairly wide light range, as long as some moderate light reaches the surface. That combination makes it a reasonable "first floater" for a simple, minimal-fuss build.
It's also commonly recommended for Walstad-style (soil-substrate) dirted tanks. In a newly dirted tank, the soil can release a burst of ammonia and excess nutrients as it breaks down; floating plants like Red Root Floater help absorb that surplus and reduce the algae blooms that often follow. For this setup:
- Favor moderate lighting duration (10–14 hours/day) over chasing maximum intensity, since dirted tanks are already nutrient-rich
- Avoid strong surface agitation — something a Walstad tank's minimal filtration should already keep in check
Combining with Other Floating Plants
If you're stacking Red Root Floater with duckweed, Salvinia, or other floaters, watch for two tradeoffs. First, faster-spreading species like duckweed can shade out the slower-growing Red Root Floater and steal the water-column nutrients it depends on. Second, once coverage gets dense, only the top layer receives real light, so mixed floater mats need more frequent thinning than a single-species colony.
Quarantine Before Adding to Your Display Tank
Floating plants are common hitchhiker vectors for pest snails, duckweed fragments, and other unwanted passengers, especially when ordered online. Before adding new Red Root Floater to an established display, rinse it and hold it in a separate quarantine container for a week or two so you can spot and remove any hitchhikers before they reach your main tank.
Propagation: How It Multiplies
Red Root Floater propagates on its own through side-shoot runners (stolons) that form daughter plantlets attached to the mother rosette by a short connecting stem. Given stable light, temperature, and nutrients, a colony can double in size in 1–2 weeks.
To separate daughter plants:
- Wait until the daughter has developed its own healthy root cluster — don't rush this step.
- Gently pinch or snip the thin connecting stem between mother and daughter.
- When separating underwater, use your fingers rather than scissors where possible; the roots are fragile and fine blades can nick them if you're not careful. Scissors are fine for cutting the stem itself once you can see it clearly above the roots.
- Let the separated daughter float freely — no substrate or special technique is required.
To speed up propagation generally: maximize light intensity and duration, dose fertilizer consistently, and keep temperatures stable and warm. Interrupted conditions slow down runner formation more than almost anything else.
Thinning and Ongoing Maintenance
Because it reproduces quickly, Red Root Floater needs regular thinning. Leave 50–70% of the water's surface open so that light still reaches submerged plants and gas exchange at the surface isn't blocked. Set a weekly or biweekly habit of scooping out excess coverage rather than waiting until the tank is solidly capped.
If you keep shrimp or fry in the tank, thin carefully — the dangling roots are a popular grazing surface and hiding spot, so trim from the edges of the mat rather than clearing it all at once.
Common Problems and Fixes
| Symptom | Likely cause | Fix |
|---|---|---|
| Plant stays green, not red | Insufficient light intensity/duration, or low iron/micronutrients | Increase light and add a micronutrient fertilizer |
| Melting or yellowing after purchase | Normal transition stress | Keep parameters stable; don't panic-dose or change light |
| Roots turning brown/mushy, leaves flipping | Too much surface flow or splashing | Relocate to a calmer spot or reduce flow |
| Holes or translucent leaves | Nutrient deficiency (potassium/micros) or sudden light change | Dose a balanced liquid fertilizer; avoid abrupt light changes |
| Overgrowth choking the tank | Skipped thinning | Set a weekly/biweekly thinning routine |
| Plants pulled into filter intake | No containment used | Add a floating ring or frame early |
| Crash after a water change | Sudden hardness/pH swing | Match new water closely and dose dechlorinator |
Seasonal Adjustments for Low-Tech and Window-Lit Tanks
If your low-tech tank sits near a window or relies partly on natural daylight, remember that light intensity and day length shift with the seasons. In winter, shorter days and weaker sun angle may drop your effective light below what's needed for red color, so supplement with a timed LED fixture rather than relying on the window alone. In summer, watch for excess heat near a sunny window, which can push water temperature above the comfortable range for the plant.
Filter your fixture and flow choices through the categories above, and you'll have a stable base for both keeping and multiplying this plant. Browse FishyHub's full range of freshwater livestock and aquascaping supplies to round out a tank built for floating plants.
Frequently Asked Questions
Why is my Red Root Floater turning green instead of red?
The most common causes are insufficient light intensity or duration, or a lack of iron and other micronutrients. Increase your light's intensity or daily duration first, then add a micronutrient fertilizer if color still doesn't improve after a couple of weeks.
Does Red Root Floater need CO2?
No. CO2 is optional and can speed up growth and intensify color in a high-light setup, but the plant grows and colors up without it in most tanks.
How do I stop it from taking over my tank?
Thin the colony regularly — weekly or biweekly — use a floating containment ring, and leave 50–70% of the surface open at all times. Skipping thinning is the main reason floaters get out of control.
Can it live with a strong filter or air stone?
Only if the flow is redirected away from the surface where the plant floats. Direct current or splashing at the surface causes flipping, root damage, and melt, so use a baffle or position the colony in a calm corner instead.
How do I propagate it faster?
Maximize light intensity and duration, dose fertilizer consistently, and keep temperatures stable and warm. Let each daughter plantlet grow its own root cluster before separating it from the mother rosette.
Is it good for a Walstad or dirted tank?
Yes. It's a commonly recommended floater for dirted setups because it helps absorb the excess nutrients a soil substrate releases, which in turn reduces algae from early ammonia spikes.
Will it work in a low-light tank?
It will survive in low light but usually stays green and grows slowly. It needs at least moderate light intensity and duration to develop strong red coloration.
Is it safe with shrimp and fry?
Yes. It's popular for providing shelter and a grazing surface for shrimp and fish fry, and it has no sharp edges or toxicity concerns.


