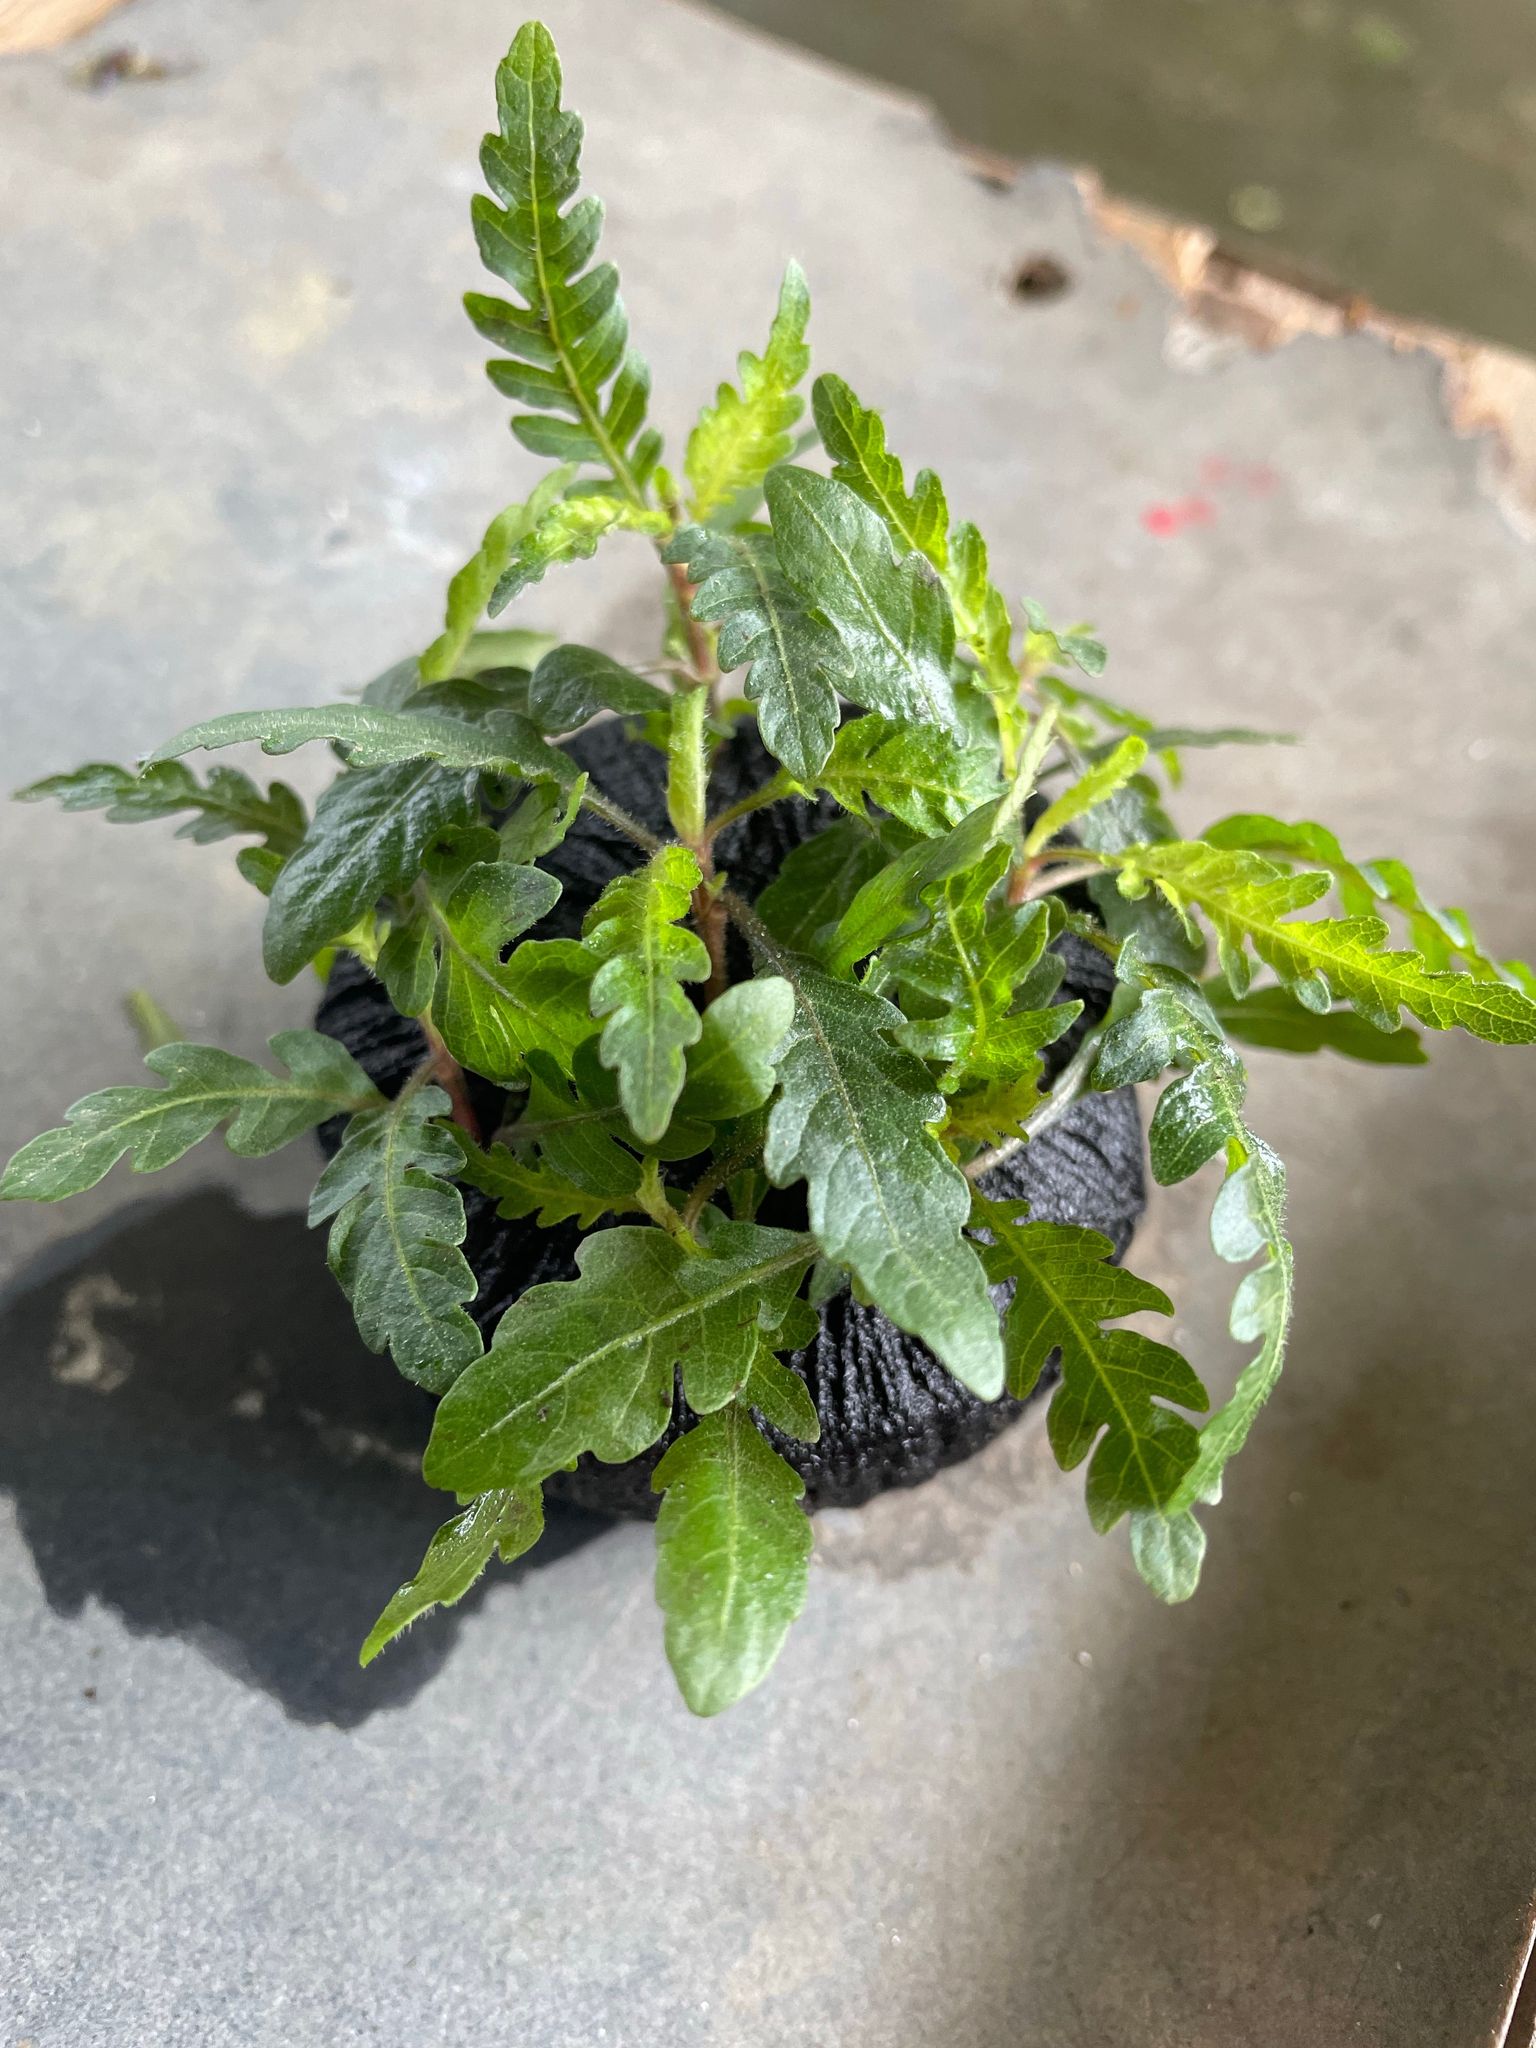
How to Plant and Propagate Hygrophila Pinnatifida in a Freshwater Aquarium
Hygrophila pinnatifida is one of the few stem plants that behaves like an epiphyte, so it can go into substrate or ride on driftwood like an Anubias. This guide walks through both planting methods, the light and CO2 setup that brings out its signature bronze-red color, and the step-by-step process for propagating it from cuttings or division.
What Makes This Plant Different
Native to streams in the Western Ghats region of India, Hygrophila pinnatifida grows partly emersed along stream banks in the wild, which is part of why it tolerates both fully submerged and paludarium-style setups. It belongs to the Acanthaceae family, alongside other Hygrophila species, but its narrow, deeply lobed, fern-like leaves set it apart from broader-leaved relatives like Hygrophila corymbosa.
That oak-leaf silhouette, combined with foliage that shifts between olive-green and copper-bronze depending on light, makes it one of the more visually distinctive specimen plants available for aquascaping. Rather than filling a role as a carpet or plain background filler, it works best as a textural accent — many aquascapers pair it with red-leaved or lace-leaved plants in a nature-style layout to create contrast without relying on a single dominant color.
Typical size: roughly 6–16 inches (15–40 cm) tall and 4–8 inches (10–20 cm) wide, though the range varies with maintenance. Plants trimmed regularly and grown fully submerged tend to stay on the shorter, bushier end (closer to 5–8 in), while unpruned or partially emersed specimens grow taller and looser. It spreads outward via lateral runners about as readily as it grows upward, so give it horizontal space in the layout.
Water Parameters and Lighting
| Parameter | Recommended Range |
|---|---|
| Temperature | 68–82°F (20–28°C) |
| pH | 6.0–7.5 (neutral to slightly acidic preferred) |
| Lighting | Medium to high intensity |
| CO2 | Not required, but strongly recommended |
| Fertilization | Root tabs + liquid micros/potassium |
Older wattage-per-gallon rules of thumb don't translate well to modern LED fixtures, since output varies enormously between brands. A more reliable target is moderate-to-high PAR, roughly 50–100+ µmol/m²/s at the substrate. In practical terms, that means a bright full-spectrum LED run for 8–10 hours a day, positioned so the plant sits in the higher-light zone of the tank rather than tucked in a shaded corner. You can browse LED lighting options sized for your tank footprint to hit that range without guesswork.
Light intensity and duration are the single biggest factor in whether this plant shows green or red-bronze coloring. Under low or standard low-tech lighting, leaves stay mostly green and the lobing tends to be less pronounced. Under adequate light, expect a more compact, bushy growth habit with more lateral shoots; under lower light the plant grows taller and leggier with fewer side branches.
CO2 injection isn't a survival requirement, but it noticeably accelerates growth and deepens color when paired with micronutrient dosing. Without CO2, expect slower, greener growth that still holds up fine in a low-tech setup — it just won't hit its full visual potential.
Two Ways to Plant Hygrophila Pinnatifida
Method 1: Substrate Planting
Treat it like a standard stem plant:
- Separate individual stems or small clumps if the plant arrived as one dense portion.
- Plant the rhizome-like stem base shallowly into a nutrient-rich substrate — burying only the root mass, not the stem itself.
- Space stems 2–3 inches (5–7.5 cm) apart to allow lateral spreading room.
- Avoid pressing the crown below the substrate surface; planting too deep is the most common cause of stem and root rot in this species.
A nutrient-rich base or the addition of laterite/iron-rich substrate additives helps support the coloration this plant is grown for. You can compare substrate options, including nutrient-enriched soils, in the substrate category.
Method 2: Epiphyte-Style Attachment to Hardscape
Because its horizontal, rhizome-like stems root onto surfaces much like Anubias or Bucephalandra, Hygrophila pinnatifida can be attached directly to driftwood or rock instead of planted in substrate:
- Lay the stem flat against the wood or rock surface, following the material's natural contours.
- Secure it with cotton thread, fine fishing line, plant-safe mesh, or an aquarium-safe cyanoacrylate gel at a few contact points along the stem.
- Keep the growing tip and leaves unobstructed — cover only the stem itself, not the foliage.
- Leave the attachment undisturbed. New root threads typically become visible in 2–4 weeks, with a firmer, self-sustaining hold developing over 6–8 weeks.
- Resist the urge to reposition it early — stems that are moved before roots form often float free and have to be re-secured from scratch.
Both methods work well; the substrate route generally establishes faster because roots have immediate access to nutrients, while the hardscape route is better suited to aquascapes where you want the plant positioned mid-tank on wood rather than rooted in the ground.
Feeding for Growth and Color
This plant is a moderately heavy root feeder. A combination of root tabs pushed near the root zone plus a liquid fertilizer supplying potassium and micronutrients (especially iron) supports both growth rate and coloration. Skipping fertilization is a common reason growth stalls or color fades even under otherwise good light.
Watch specifically for:
- Potassium deficiency — shows up as small holes or perforations in older leaves; corrected with a potassium supplement.
- Iron/micronutrient shortage — often shows as leaves staying flat green instead of developing bronze or red tones, even under strong light.
Propagating Hygrophila Pinnatifida
Propagation is straightforward and is essentially the only practical method hobbyists use — flowering and seed production are rare in aquarium conditions, so vegetative propagation (cuttings or division) is the path to expect.
Propagation by Cuttings
- Trim either the top portion of a stem or a lateral (runner-like) side shoot.
- Prioritize lateral shoots when available — they tend to root and establish noticeably faster than top cuttings. Top cuttings still work fine; they simply take longer to develop roots.
- Let the cutting float in the water column, or rest it in a low, shallow container of tank water, until visible white roots appear — typically within one to two weeks.
- Once rooted, plant or attach the cutting using either method above.
- Replant shallowly. As with the parent plant, deep planting of a fresh cutting invites rot before roots can establish.
Propagation by Division
For an already-established mat or hardscape-rooted network:
- Identify sections of the rhizome network that each have their own roots and an active growth point.
- Cut the connecting stem between sections with clean scissors.
- Replant or reattach each division separately.
Division is the faster route to multiple mature-looking plants, while cutting propagation is better suited to generating new stock from a single specimen over time.
Maintenance: Pruning and Algae Control
Regular trimming of leggy stems keeps the plant compact and encourages fuller, bushier growth — without it, the plant thins out and looks sparse over time. Prune the growing tips every few weeks once the plant is established, and use the trimmings for propagation rather than discarding them.
The finely lobed leaf structure that gives this plant its texture also has a practical downside: it traps debris and algae more readily than smooth-leaved plants. During routine maintenance, gently brush leaves with a soft tool or shake them in the water column during water changes to dislodge trapped detritus, and keep an eye on lower, older leaves where buildup tends to concentrate first.
Quarantine Before Adding New Plants
New Hygrophila pinnatifida — whether purchased as a potted specimen or a tissue-culture cup — can carry hitchhikers like snail eggs or algae spores. A short quarantine or a plant dip before introducing it to an established tank reduces the risk of introducing pests alongside the plant. Potted specimens grown in soil-based media generally warrant a more thorough rinse of the root mass than tissue-culture plants, which are grown in a sterile environment.
Emersed and Paludarium Growth
Because it naturally grows partly emersed along stream banks in its native range, Hygrophila pinnatifida adapts well to riparium and paludarium setups where roots stay wet but leaves grow in open air. Emersed growth often produces a different leaf texture and can shift coloration compared to the fully submerged form, but care requirements — stable temperature, consistent moisture, and decent light — stay largely the same.
Standard Form vs. the "UK" Variety
The variety sometimes labeled "UK," collected from a specific region within its native range, tends to show more intense red coloration and deeper leaf lobing than the standard form under the same conditions. Care requirements don't differ between the two — the distinction is mostly cosmetic and shows up most clearly under strong light and CO2.
Frequently Asked Questions
Does Hygrophila pinnatifida need CO2 to survive?
No. It survives fine without injected CO2, but growth is slower and leaves tend to stay greener rather than developing bronze-red tones. Adding CO2 alongside micronutrient dosing produces a noticeably faster, more colorful plant.
Can it be grown without substrate, just attached to wood or rock?
Yes. Despite being a true stem plant, its rhizome-like stems function well as an epiphyte and will root onto hardscape surfaces over several weeks, similar to how Anubias or Bucephalandra attach.
Why are my Hygrophila pinnatifida leaves green instead of red or bronze?
This usually comes down to insufficient light intensity or duration, or a lack of micronutrients — especially iron. Increasing light output and adding a fertilizer with iron and other micros typically restores color within a few weeks.
How fast does it grow and spread?
It has a moderate growth rate and spreads laterally through runners as much as it grows upward, so it needs horizontal space in the aquascape or regular trimming to keep it contained.
What's the difference between the standard form and the "UK" variety?
The UK variant tends to show more intense red coloration and deeper leaf lobing under the same care conditions. Water parameters, lighting, and feeding requirements are identical between the two.
How do I propagate it — cutting or division?
Both methods work. Snipping lateral shoots or stem tops and rooting them in water before replanting is the simplest approach, while dividing an established mat into rooted sections is a good option once you have a larger colony to work from.
Is it suitable for a low-tech tank with no CO2 and low light?
It will survive in a low-tech setup, but expect slower growth, mostly green leaves, and less pronounced lobing than it would show under stronger light and CO2.
Can it be grown emersed, like in a paludarium?
Yes. It naturally grows partly emersed in the wild along stream banks, and adapts well to riparium and paludarium conditions with consistent moisture and decent light.
Ready to add this plant to your layout? Browse substrate options and other planted-tank supplies on FishyHub to get your setup ready before your Hygrophila pinnatifida arrives.


