

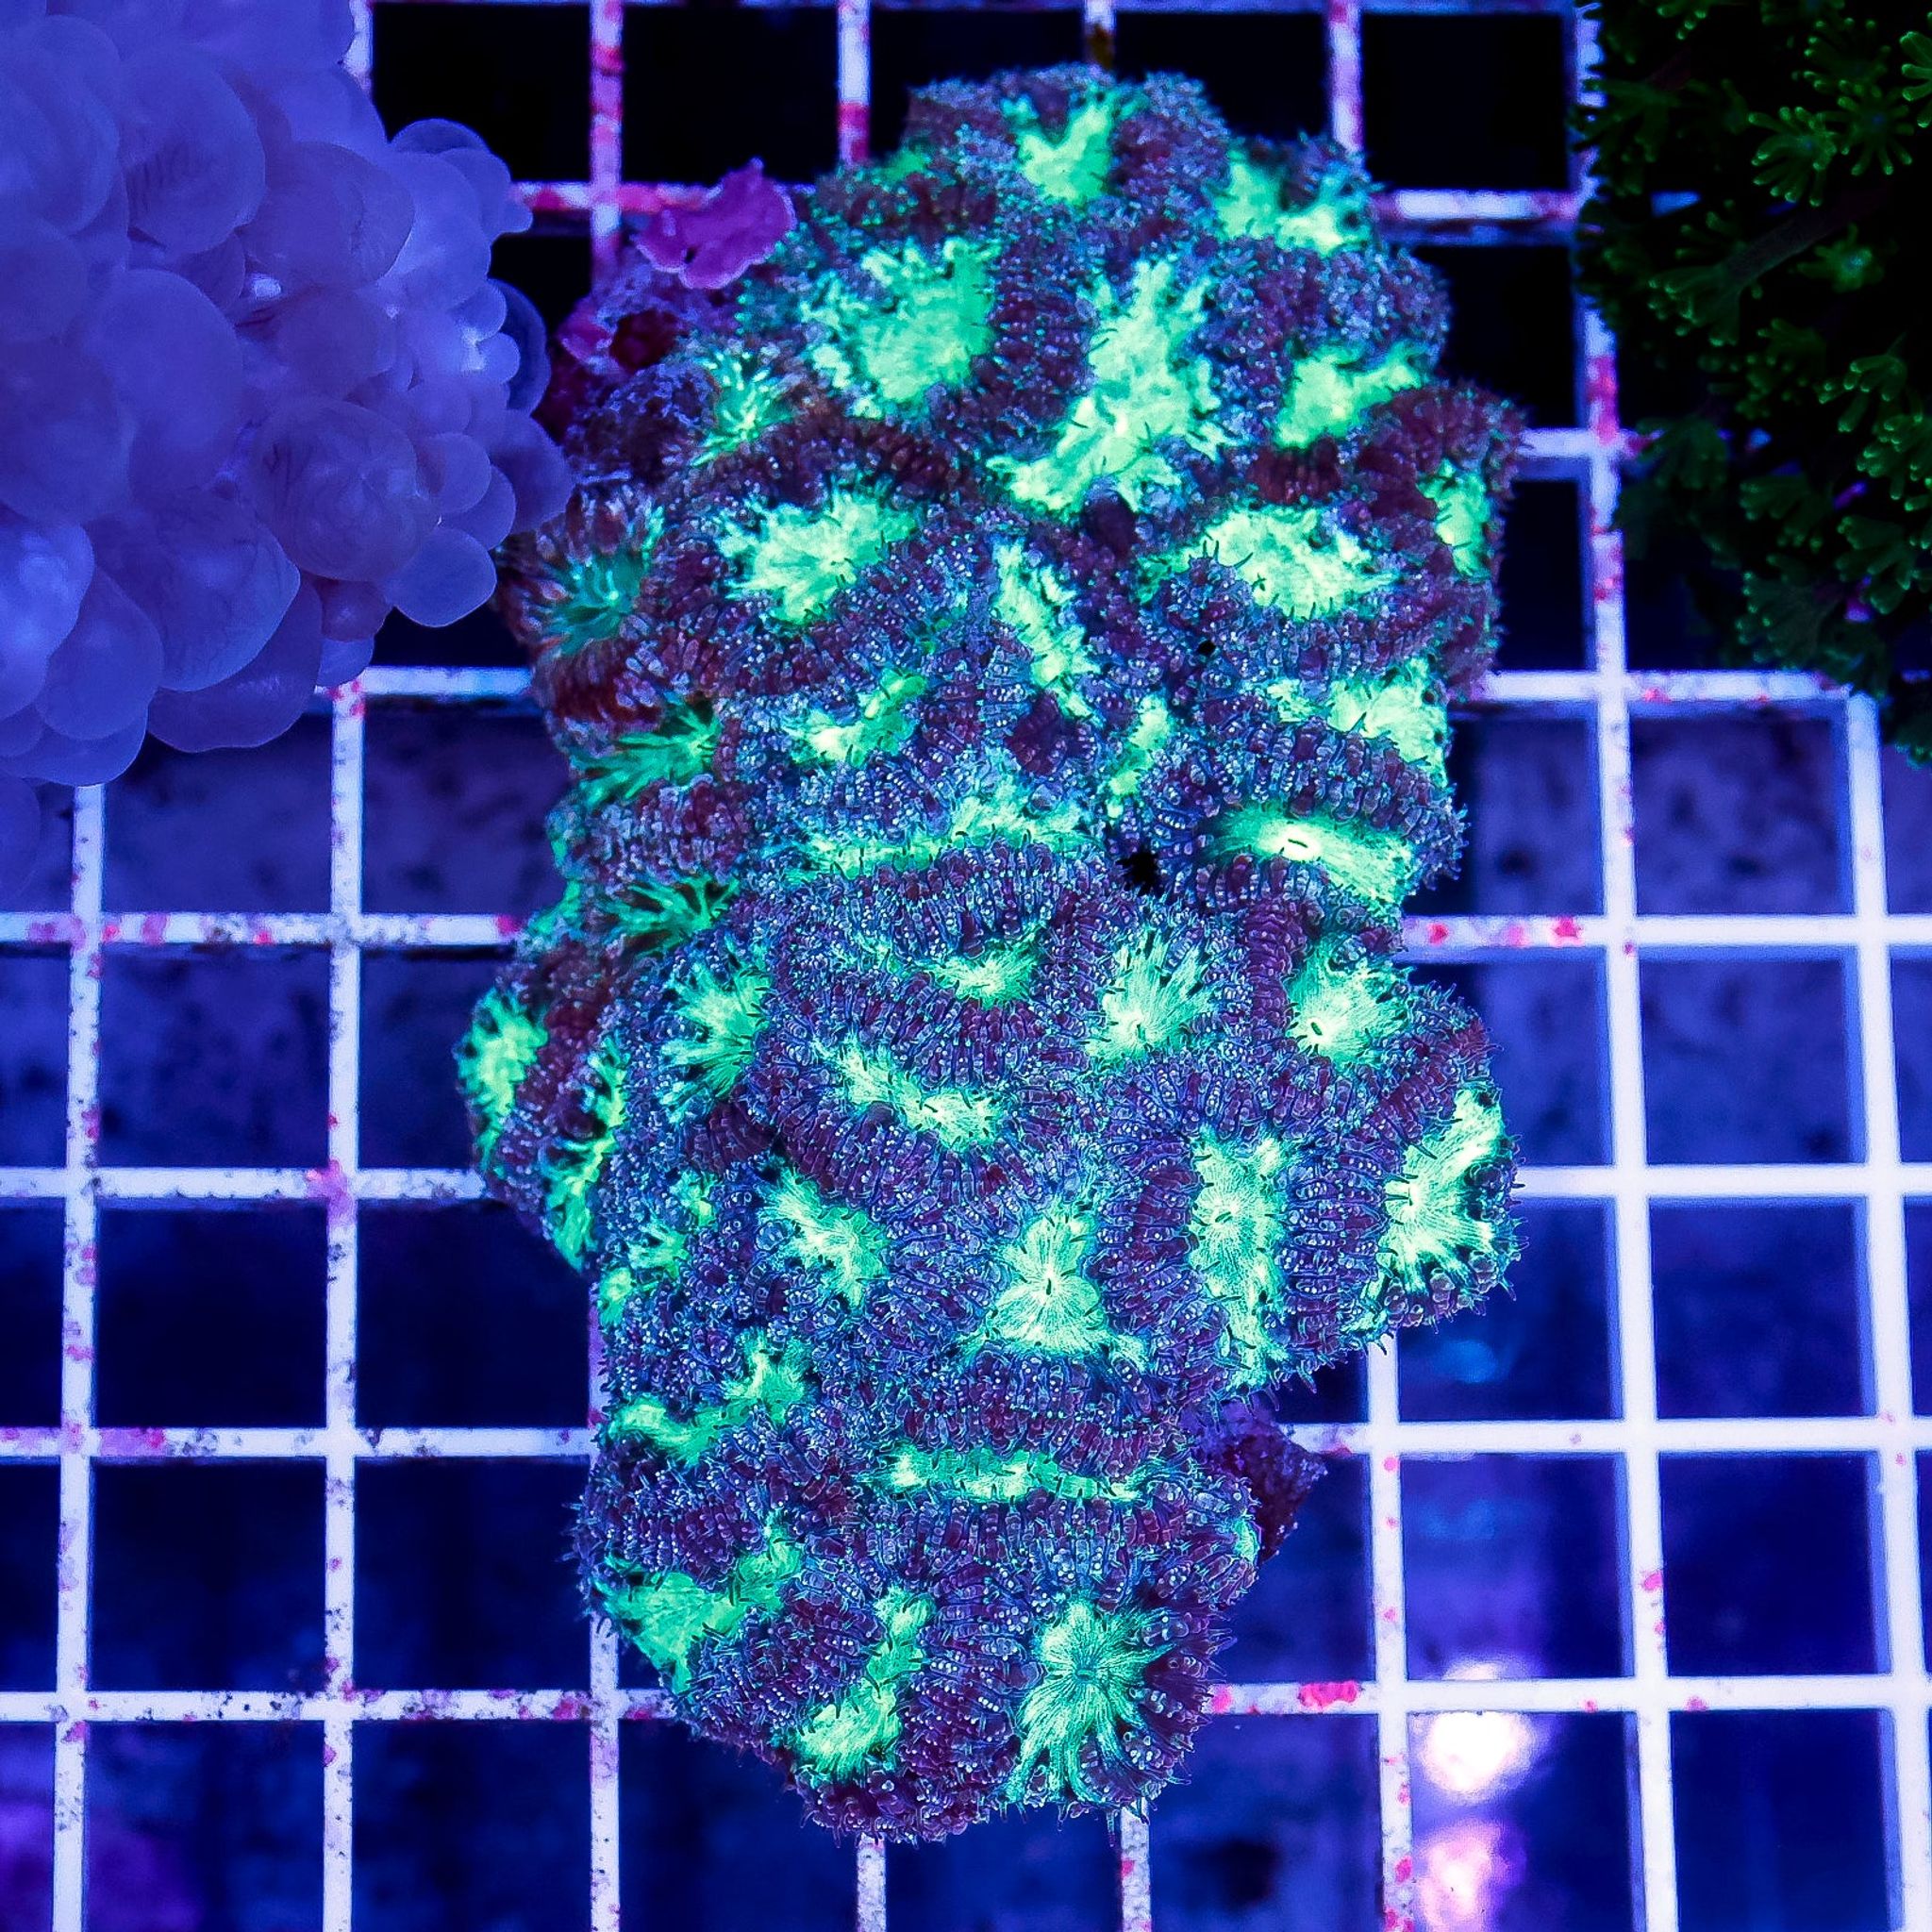

Blastomussa Care Guide: Lighting, Flow, Feeding and Placement
Blastomussa is one of the easiest large-polyp stony corals to move into once you've outgrown softies, but getting the light, flow, and feeding numbers wrong still causes bleaching, retraction, or stalled growth. This guide gives you the actual ranges to target and shows exactly where in your rockwork this coral belongs so those numbers hold steady.
What Is Blastomussa Coral?
Blastomussa is a genus of large-polyp stony (LPS) coral known for round, fleshy, brain-like polyps that often show striking two-tone combinations of red, green, purple, and teal. Two species dominate the hobby:
- Blastomussa wellsi — larger polyps, fewer per head, often sold as single or small multi-head frags.
- Blastomussa merletti — smaller, more numerous polyps packed tightly across a head.
Care requirements are essentially identical between the two; the difference is mostly cosmetic and in how a colony looks as it fills in. Both are rated easy-to-moderate, making Blastomussa a natural first LPS pick for a reefer coming from mushrooms, zoanthids, or soft corals and looking to try something with more structure.
Lighting: Keep It Low-to-Moderate
Blastomussa does best under 75–125 PAR at the polyp surface. That's noticeably dimmer than what SPS corals want, and pushing intensity toward SPS-style output is the fastest way to bleach a colony or turn its color pale and washed out.
A few practical notes:
- Under LED fixtures, place Blastomussa on a mid-to-lower rock shelf, or run the fixture dimmed if it sits higher in the tank.
- Fixture type matters less than where you position the coral and how you dial in intensity — a modern LED, T5, or hybrid setup can all work fine at the right PAR.
- Some keepers successfully run Blastomussa a bit below 75 PAR, especially under actinic-heavy spectrums or in the shade of overhanging rock, provided supplemental feeding picks up some of the energy slack. Treat 75–125 PAR as the sweet spot, not a hard floor.
Acclimate new frags gradually. Start any new piece in a shadier, lower-light spot for 1–2 weeks, watching for full polyp extension and stable coloration before moving it toward its permanent, brighter placement. Skipping this step and dropping a fresh frag straight under strong light is one of the most common ways beginners bleach an otherwise healthy coral.
Flow: Gentle and Indirect, Never Direct
Blastomussa wants low, indirect, turbulent flow — enough movement to keep detritus from settling on the polyps, but never a direct current hitting the coral head-on. Direct or blasting flow causes:
- Polyp retraction that can last for hours or days
- Physical tissue damage from constant buffeting
- A weak or absent feeding response, since extended polyps can't catch food in strong current
Aim powerheads to sweep front-to-back across your rock islands rather than straight at any one ledge, so flow stays random and diffused by the time it reaches a Blastomussa colony.
Where to Place Blastomussa in the Rockwork
Placement is really where lighting and flow come together, so it deserves its own section rather than a bullet point.
Building Rock Structure Around Its Needs
Set your dry or cured live rock directly on the glass bottom of the tank, with sand added around the base afterward rather than underneath it — this prevents a collapse if a burrowing fish or invertebrate digs at the base. A two- or three-island layout with varied heights, rather than one solid back wall, gives you both high, turbulent peaks for light-hungry corals and low, shaded ledges for LPS — while still leaving meaningful open swimming space instead of over-rocking the tank.
Leave a couple of inches of clearance from the front and side glass so you can still reach in for maintenance and feeding.
Choosing the Actual Spot
- Place Blastomussa on lower-to-mid tank ledges or in cave-like overhangs, in the shadow of the rock structure, where flow is naturally diffused before it reaches the polyps.
- Reserve high, turbulent peaks near the light for SPS corals — that's the opposite environment Blastomussa wants.
- Never place it directly on sand. It needs a hard surface to attach to, so set the frag plug or base rock on a ledge or the substrate's rock surface, not embedded in the sand bed itself.
- Leave several inches of clearance from neighboring corals in every direction, and more as the colony grows — see the aggression section below.
- Once a coral is settled and growing, avoid constantly rescaping around it; repeated disturbance stresses LPS more than most keepers expect.
Feeding: Optional but Worth Doing
Blastomussa gets a baseline of energy from the zooxanthellae (symbiotic algae) living in its tissue, so it can survive on light alone. But supplemental feeding makes a visible difference in growth rate, polyp size, and color saturation.
Feeding frequency recommendations range across a spectrum:
| Feeding approach | Frequency | What to expect |
|---|---|---|
| Light/minimal | Weekly | Survives, holds baseline color, slow growth |
| Moderate (recommended) | 2–3x per week | Noticeably better polyp extension and growth |
| Heavy | Every other day | Fastest growth once the coral is established |
Good food options include mysis shrimp, phytoplankton, prepared coral food blends, or other meaty micro-foods small enough for the polyp's mouth. You can browse target-feeding options and other LPS corals suited to the same feeding routine, along with feeding supplies in the food and supplements category.
Feeding technique: turn off flow in that area of the tank for about 30 minutes during target feeding so food isn't immediately swept away, then resume normal flow once polyps have retracted back around their meal.
Water Parameters
Blastomussa doesn't need anything exotic — standard reef parameters apply, with a couple of nutrient notes worth calling out.
| Parameter | Target range |
|---|---|
| Temperature | 72–78°F (22–26°C) |
| pH | 8.1–8.4 |
| Salinity (SG) | 1.023–1.026 |
| Alkalinity (dKH) | 8–12 |
| Calcium | 400–450 ppm |
| Magnesium | 1250–1350 ppm |
| Nitrate | ~2–10 ppm |
| Phosphate | ~0.03–0.1 ppm |
Note that nitrate and phosphate targets aren't zero. A small amount of trace nutrient actually supports better LPS color and feeding response compared to an ultra-low-nutrient system — Blastomussa tends to look duller and feed less enthusiastically in a tank scrubbed completely clean of nitrate and phosphate.
Stability matters more than hitting exact numbers. Swings in alkalinity, calcium, or magnesium stress LPS corals more than a parameter sitting slightly outside the ideal range but holding steady. Test regularly and correct drift gradually.
Growth and Aggression
Individual Blastomussa polyps can reach 1–2 inches (2.5–5 cm) across. Growth is slow-to-moderate — colonies encrust and add new heads gradually over months rather than weeks, and a mature colony of 6–8 heads can eventually span close to a foot.
Blastomussa is relatively peaceful compared to other LPS, but it still extends sweeper tentacles at night to sting anything within reach. Maintain a minimum buffer of several inches from neighboring corals when placing it, and increase that spacing as the colony grows over time.
Tank Size and System Maturity
Blastomussa adapts well to nano tanks (20 gallons / 76 liters and up) through large reef systems — there's no strict minimum size. What matters more than gallon count is system maturity: a stable tank that's been running for months handles Blastomussa noticeably better than a brand-new setup still working through cycling swings.
Quarantine and Dipping New Frags
LPS shipments, including Blastomussa, are common carriers for hitchhiking pests like flatworms and nudibranchs. Before adding any new frag or colony to your display, quarantine it separately and dip it in an iodine-based coral dip. This single step catches most pest problems before they ever reach your main tank, and it's worth doing even when a piece looks perfectly healthy on arrival.
Tankmate Considerations
Blastomussa's extended polyps are an easy target for fish species known to peck or nip at coral tissue. When stocking a tank that includes Blastomussa, avoid known coral-nipping fish and favor reef-safe species that leave LPS polyps alone, giving the coral a better chance to stay fully extended during the day.
Propagation
Established colonies can be fragged by cutting along the skeleton between polyp heads or corallites using a saw or coral shears. After cutting:
- Dip the cut edges in an iodine-based coral dip to disinfect the exposed skeleton.
- Place the new frag in a low-light, low-flow spot to recover.
- Once the polyp has fully re-extended and looks stable, move it gradually toward its intended display placement.
Common Mistakes and Troubleshooting
Use this quick symptom-to-fix reference when something looks off:
| Symptom | Likely cause | Fix |
|---|---|---|
| Polyps stay retracted for days | Flow too strong, light too intense, or recent transport stress | Move to a shaded ledge, reduce nearby pump output, allow more acclimation time |
| Bleached or pale coloration | Lighting too intense, especially on a new frag | Move to lower PAR and reintroduce brightness gradually over 1–2 weeks |
| Tissue recession near one edge | Contact with a neighboring coral's sweeper tentacles | Increase spacing by several inches or more |
| Coral survives but stays small and dull | No supplemental feeding | Add target feeding 2–3x per week |
| Slow overall decline despite good routine | Unstable alkalinity, calcium, or magnesium | Test more frequently and smooth out swings rather than chasing exact numbers |
| Brown, jelly-like tissue dissolving rapidly | Brown jelly infection (rare but serious) | Isolate the coral immediately and remove affected tissue |
Reading Polyp Extension as a Daily Health Check
A quick daily glance tells you a lot. Fully puffed, rounded polyps with tentacles extended during the day is the normal, healthy look. Brief retraction at night or right after target feeding is completely normal. Prolonged retraction lasting most of the day, shriveled tissue, or a receding edge are signals to check flow, light, and parameters before the problem progresses.
Frequently Asked Questions
Is Blastomussa coral easy for beginners?
Yes. It's considered one of the more forgiving LPS options once basic lighting, flow, and parameter targets are dialed in, making it a solid stepping stone from soft corals into stony corals.
Does Blastomussa need to be fed?
Not strictly — it gets baseline energy from zooxanthellae and can survive on light alone. Supplemental feeding, though, meaningfully improves growth rate, polyp size, and color.
What lighting is best — LED, T5, or other?
Any modern reef lighting fixture works as long as intensity is dialed to the 75–125 PAR range at the coral's placement. Where you position the coral in the rockwork matters more than which fixture type you're running; check the lighting category for fixtures with adjustable intensity if you need finer control.
Can Blastomussa touch other corals?
No. It has stinging sweeper tentacles, especially active at night, that can damage tissue on neighboring corals. Keep several inches of clearance and increase that buffer as the colony grows.
Why are my Blastomussa polyps not opening?
Usually one of a few causes: flow that's too strong, lighting that's too intense, recent transport or acclimation stress, or unstable water parameters. Work through those in order, starting with flow and light, since they're the most common culprits.
How fast does Blastomussa grow?
Slow-to-moderate. New polyps and heads form gradually over months rather than weeks, though a mature, well-fed colony can eventually reach close to a foot across.
Can Blastomussa be kept in a nano reef tank?
Yes. It adapts well to nano systems of 20 gallons (76 liters) and up, as long as parameters stay stable and you can moderate flow and light near its placement.
What's the difference between Blastomussa wellsi and merletti?
Wellsi has larger polyps with fewer per head, while merletti has smaller, more numerous polyps packed together. Care requirements between the two are essentially the same.
Ready to add one to your reef? Browse available frags and colonies in FishyHub's LPS hard corals category and match one to the ledge you've already got waiting in your rockwork.