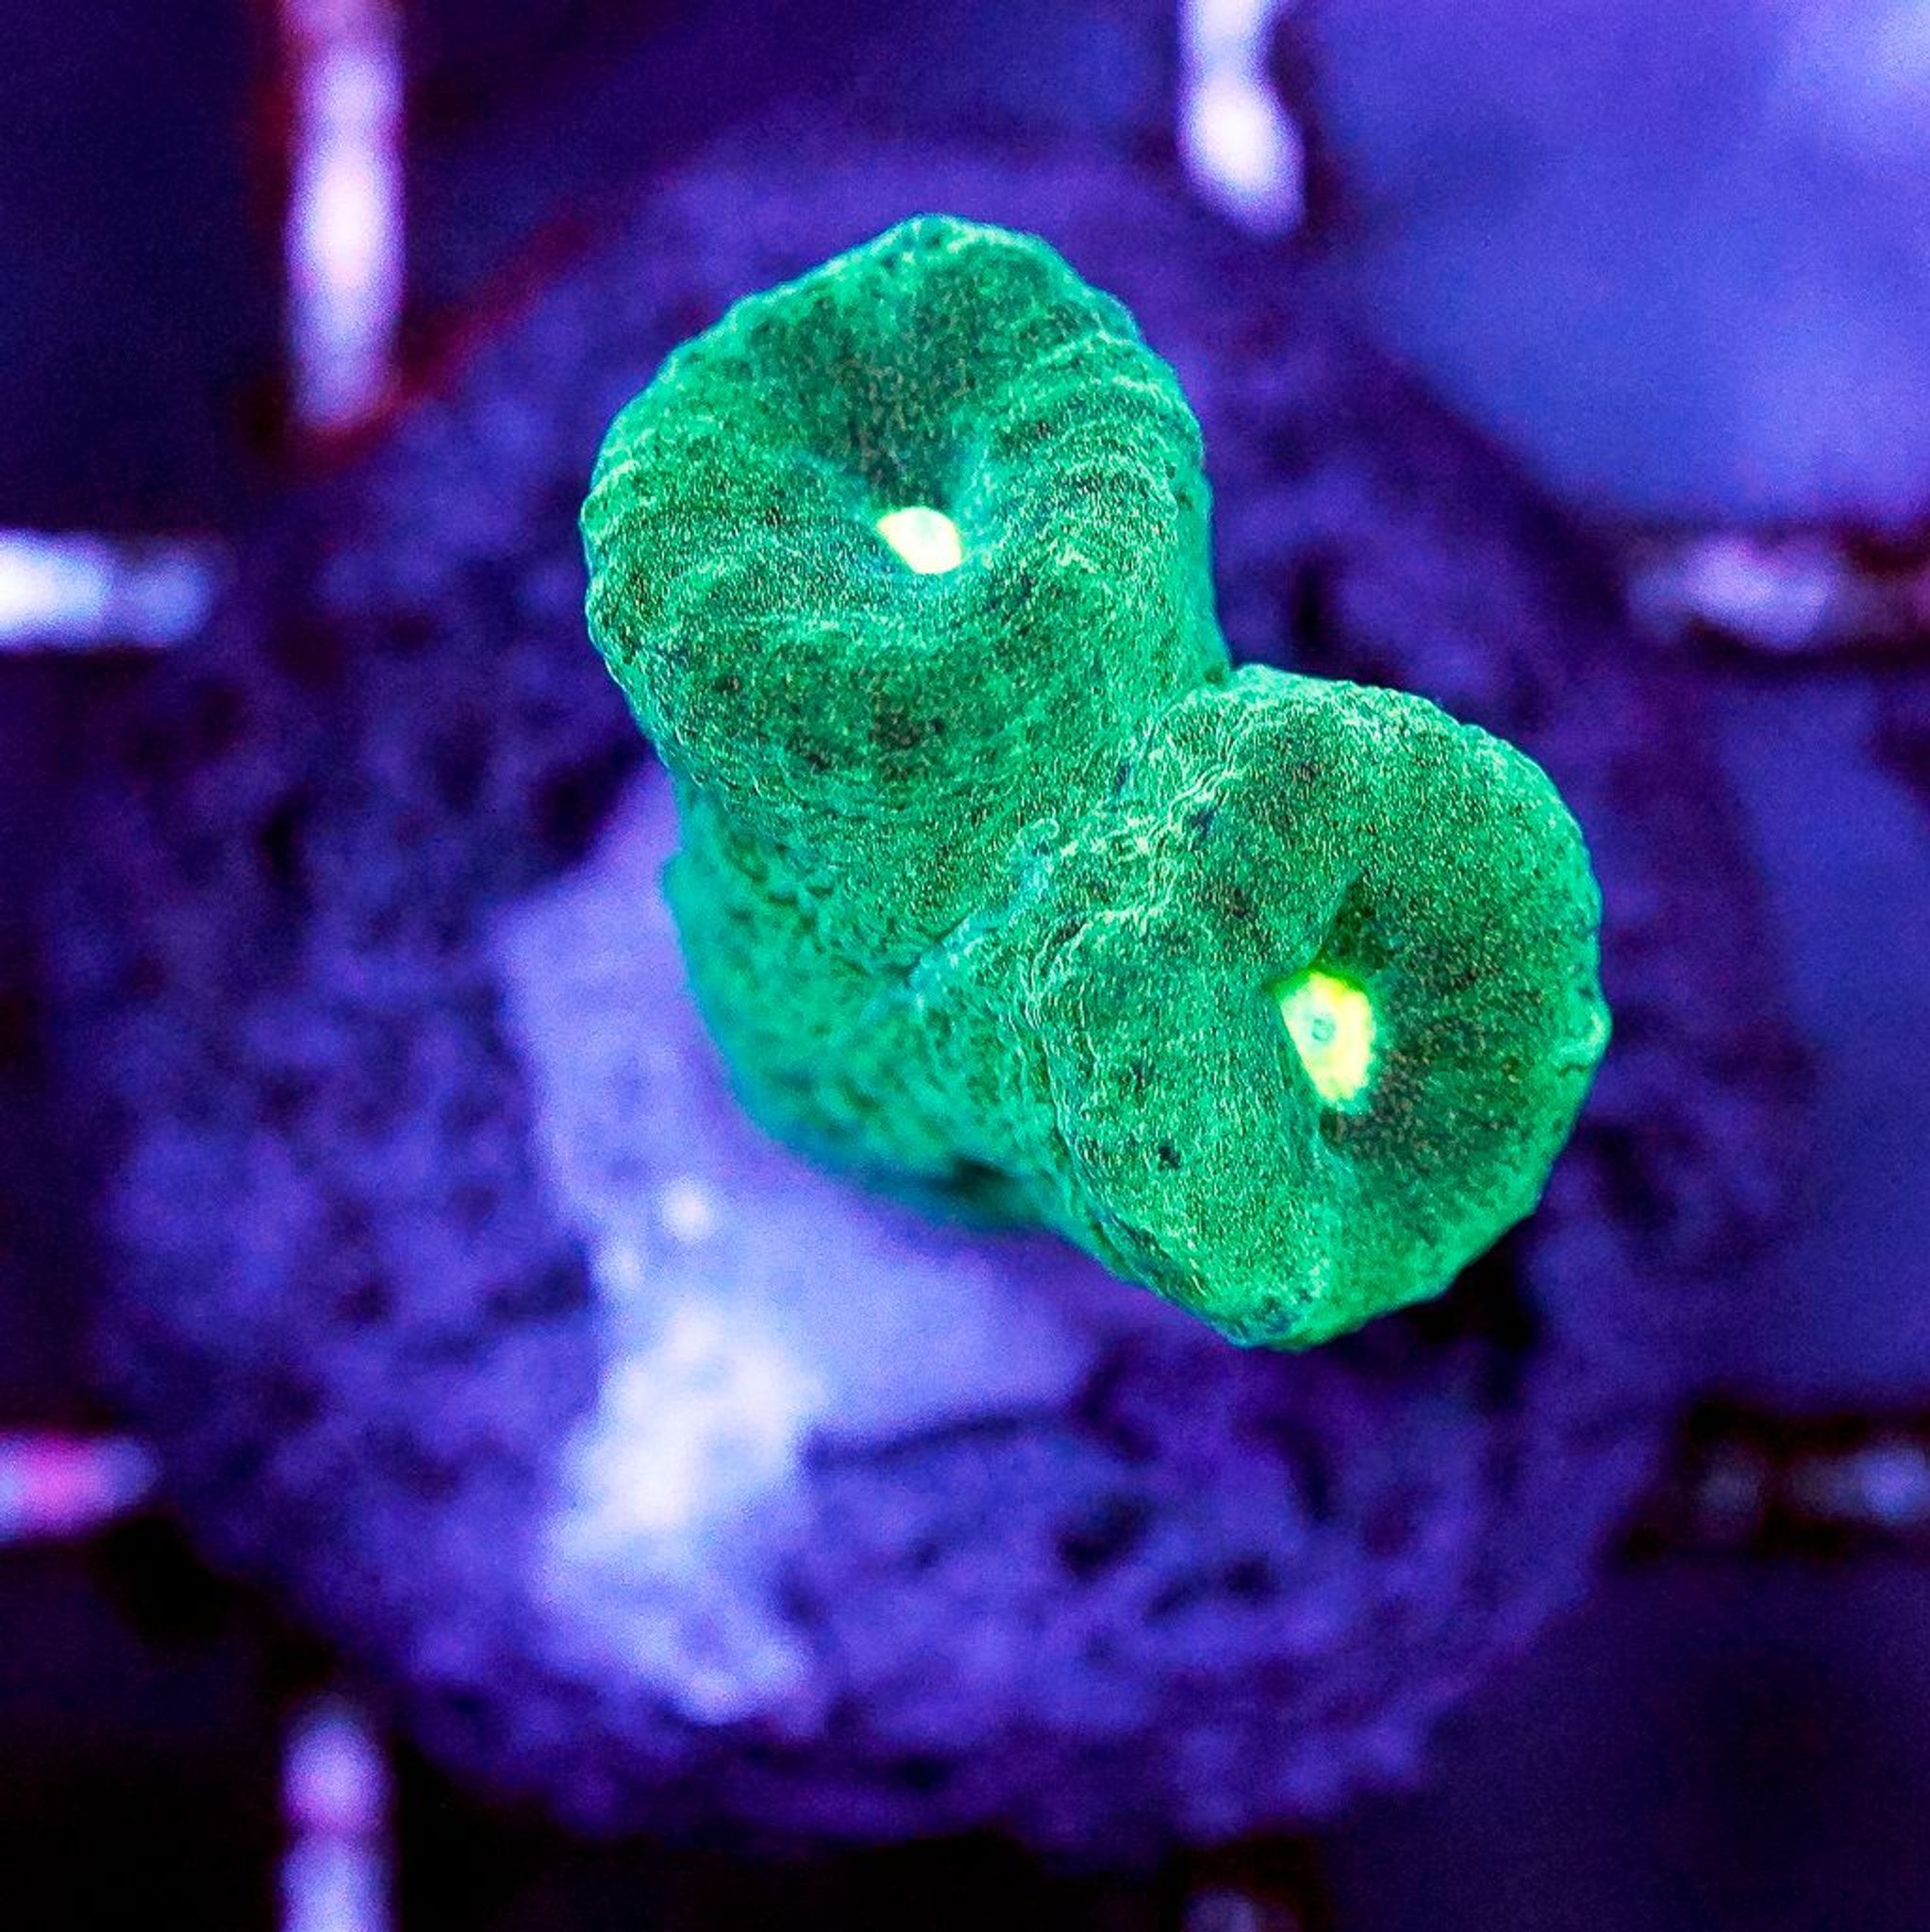
Common Candy Cane Coral Problems: Tissue Loss, Fading, Pests and Recovery
Closed polyps, a dull brown colony, or a strange jelly-like coating on your candy cane coral can look alarming, but most of these problems are reversible if you catch them early. This guide walks through the actual causes behind each symptom, what to do about it, and when a problem crosses the line into a same-day emergency.
Why Caulastrea Is a Forgiving Starter LPS
Candy cane coral (Caulastrea, also sold as trumpet coral) is one of the more beginner-friendly large-polyp stony corals available. It tolerates minor swings in water parameters better than many other LPS species, grows steadily through natural fission, and rarely shows aggressive behavior toward neighbors. That said, "hardy" does not mean "bulletproof" — most of the problems below trace back to a handful of preventable stressors: too much light, too much flow, unstable water chemistry, or an undetected pest.
Normal vs. Abnormal Appearance
Before troubleshooting, rule out a false alarm. Caulastrea polyps naturally retract at night or during the day when light or flow changes suddenly, and feeding tentacles extend temporarily during and after feeding. New mouths appearing on a single head, followed by a slow, gradual split into two heads, is normal fission — it's how the coral reproduces and grows, not a sign the colony is falling apart.
Signs that warrant a closer look instead of a shrug:
- Polyps that stay closed for more than a day or two with no obvious light/flow change
- Flesh visibly pulling back from the skeleton, exposing white or brown skeletal structure
- Any brown, stringy, or jelly-like film over the tissue
- A sudden shift from healthy color to pale/bleached-white or to dull, flat brown
Diagnostic Table: What You're Seeing vs. What It Means
| Symptom | Most likely cause | Urgency |
|---|---|---|
| Polyps closed, no slime, tissue intact | Unstable parameters, too much flow/light, or a new pest | Investigate within a day |
| Tissue receding, white skeleton showing, edges look clean | Light, flow, nutrient, or salinity stress; underfeeding | Days to fix, weeks to recover |
| Pale, bleached, or white tissue | Sudden light increase or thermal/heat stress (zooxanthellae expelled) | Address within a day or two |
| Dull, flat brown coloring, polyps otherwise open | Too little light, or high nutrients causing zooxanthellae buildup | Adjust over 1–2 weeks |
| Brown, gelatinous coating spreading across polyps | Brown jelly infection (BJI) | Same-day emergency |
| Small worms, unusual snails, or nudibranchs near polyp bases | Pest infestation | Dip and isolate within a day |
Getting the Baseline Right: Light, Flow and Water Parameters
Many "mystery" problems disappear once these three basics are corrected.
Lighting
Caulastrea needs low-to-moderate light, generally in the 50–150 PAR range. For anyone actively troubleshooting a stressed coral, treat 50–70 PAR as the safe starting point, and only push toward the higher end after several weeks of slow acclimation on a coral that's already thriving. High-end reef lighting aimed directly at a candy cane is more likely to cause bleaching than to help it.
Flow
Gentle-to-moderate, indirect flow is ideal. Direct, blasting flow flattens the polyps, reduces feeding efficiency, and can physically tear tissue over time. On the other end, too little flow lets detritus and film settle on exposed flesh, which invites infection. Position the coral so flow washes past it rather than hitting it head-on.
Water Parameters
Stability matters more than hitting an exact number. Use these as reasonable reef-tank targets:
| Parameter | Target range |
|---|---|
| Salinity | ~35 ppt (±1) |
| Alkalinity | 8–9 dKH (tolerant of 7–11 dKH if stable) |
| Calcium | 380–450 ppm |
| Magnesium | 1250–1350 ppm |
| Temperature | 75–82°F (24–28°C) |
| Nitrate | Under 5–10 ppm |
| Phosphate | ~0.03–0.2 ppm |
Chasing "perfect" numbers with aggressive dosing corrections often does more harm than the imperfect number itself — a coral adapted to alkalinity of 9 dKH is safer than one yanked between 7 and 11 dKH by overcorrection.
Tissue Recession: Causes in Order of Frequency
When flesh pulls back and exposes skeleton, work through causes roughly in this order:
- Too much light — especially a recent fixture upgrade or repositioning higher in the tank
- Too much flow — direct current hitting the coral rather than washing around it
- Elevated nitrate or phosphate — nutrient stress on tissue over time
- Salinity swings — from top-off inconsistency or evaporation
- Low pH
- Underfeeding/starvation — a coral that "looks fine" without ever being target-fed
- Physical irritation — contact from a neighboring sponge, aggressive coral, or overcrowding in a tightly packed colony
- A pest — see the pest section below
Recovery Timeline
Once the underlying cause is corrected, expect weeks, not days, for visible improvement. Remaining living tissue can gradually re-skin over exposed skeleton, but sections of bare, dead skeleton will not regrow tissue on their own — recovery only continues from tissue that's still alive at the margin. Give a stabilized coral at least 3–6 weeks before judging whether recession has stopped or reversed.
Fading and Color Loss: Two Different Problems
It's easy to lump "losing color" into one bucket, but bleaching and browning have opposite causes.
- Pale or bleached-white tissue: too much or too sudden light exposure, or thermal stress, causes the coral to expel its zooxanthellae (the symbiotic algae that give it color). This needs a quick reduction in light intensity or duration and a stable temperature.
- Dull brown tissue: usually the coral compensating for too little light by packing in more zooxanthellae. It can also be linked to high nutrient levels, physical damage, starvation, or general stress. The fix here is often the opposite of bleaching — more (not less) appropriate light, paired with nutrient control.
Feeding for Recovery and Color
Feeding is not strictly required for survival, but target-feeding 2–3 times per week with mysis shrimp, krill, LPS-specific pellets, or amino acid supplements meaningfully supports color, growth, and resistance to starvation-driven recession. Turn off flow briefly during feeding so food stays near the polyps instead of blowing past them. You can browse feeding options in FishyHub's freeze-dried food selection when building a feeding routine.
Pests: Uncommon but Worth Checking
Pests are relatively rare on Caulastrea compared to SPS corals, but they do occur:
- Flatworms — rust-brown flatworms are the most common; occasionally Acropora-eating flatworms spill over from neighboring corals
- Nudibranchs
- Parasitic or predatory snails
Regular visual inspection with a flashlight, especially between polyp heads and along skeleton branches where pests hide, is the main defense. A coral dip — iodine-based or a commercial coral dip/pest-removal product — is the standard first response for suspected pests. Dipping flushes hiding pests out into the water where you can confirm and remove them, rather than guessing based on symptoms alone. Treat a pest problem with a proper dip and physical inspection, not just by adjusting light or flow, which won't remove the pest itself.
Brown Jelly Infection: The One True Emergency
Brown jelly infection (BJI) is the most dangerous problem candy cane coral owners face. It's a fast-moving infection — generally understood as a mixed bacterial and protozoan/ciliate process rather than one single cause — that turns polyp tissue into a brown, gelatinous slime. Left untreated, it can destroy a colony within a day or two.
Brown Jelly Protocol
- Isolate immediately in a quarantine or hospital container, separate from the display tank.
- Physically remove the jelly underwater with a turkey baster or syringe, siphoning or gently blasting it off so it doesn't drift onto healthy polyps.
- Frag away dead or infected skeleton if the infection is localized, cutting to save the remaining healthy sections of the colony.
- Follow with an iodine dip on the remaining healthy piece.
- Increase flow slightly around the surviving tissue afterward to help prevent recurrence and detritus buildup.
Speed matters more than technique here. Untreated BJI is close to always fatal, and even with fast, correct treatment, mortality is meaningfully high. If you notice brown jelly at 11 p.m., don't wait until morning — start the protocol immediately. You'll find both medications and water conditioning products useful for building a quarantine treatment kit ahead of time.
Buying, Acclimation and Placement
Reduce your odds of ever facing these problems by starting clean. Before purchase, inspect the colony closely for existing tissue recession, any brown jelly signs, or visible pests between heads. Drip-acclimate slowly rather than a quick float-and-dump, then place the new coral in low light and low flow for the first 1–2 weeks before gradually adjusting toward its permanent spot. Quarantine and dip new arrivals before adding them to a display tank with other corals — you can browse healthy specimens among FishyHub's LPS hard corals when sourcing a candy cane for your setup.
Placement in the tank matters just as much as water quality. Favor lower-to-mid rockwork rather than a spot high up near intense light, and keep the coral away from a direct powerhead line so flow washes past rather than into it. Space it from aggressive SPS/LPS neighbors and sponge growth — contact irritation and overgrowth are recognized recession triggers even though Caulastrea itself is a low-aggression coral with minimal sweeper tentacle activity. Also avoid low-flow pockets in the aquascape where detritus and algae can accumulate and crowd the polyps.
Fragging and Propagation Basics
Fission is the coral's natural way of multiplying — one head slowly splits into two over weeks as a new mouth forms. Hobbyists can also intentionally cut a head with a coral-safe tool to isolate diseased tissue from a healthy section, or to propagate a thriving colony for a different spot in the tank. Cutting for disease control follows the same logic as the brown jelly protocol: remove compromised tissue promptly rather than let it spread.
Quarantine and Dipping Routine
A short standard routine catches most problems before they reach your display tank: dip any new coral (iodine-based or a commercial coral dip) right after acclimation, hold it in an observation/quarantine tank for 1–2 weeks, and inspect it daily under a flashlight for pests, recession, or slime. Re-dip and re-inspect any coral already in your display that starts showing early stress signs, even if it's been established for a while.
Common Mistakes to Avoid
- Blasting a new frag with full flow and light immediately instead of acclimating gradually
- Chasing "perfect" parameter numbers with aggressive dosing swings instead of prioritizing stability
- Ignoring closed polyps for days or weeks, assuming it will self-resolve, and missing the window to catch brown jelly early
- Placing the coral too close to sponge growth, aggressive corals, or a direct powerhead line
- Underfeeding because the coral "looks fine," leading to slow starvation-driven recession
- Mistaking normal fission (new mouths, gradual head separation) for disease
- Treating a suspected pest problem with light or flow changes instead of a proper dip and physical inspection
Long-Term Nutrient Control
Beyond one-off fixes, ongoing nutrient export routines — a protein skimmer, refugium, or carbon dosing — act as insurance against the nutrient-driven recession and fading causes covered above. These systems keep nitrate and phosphate stable in the background, reducing the odds you'll be troubleshooting a stress episode in the first place.
Frequently Asked Questions
Is my candy cane coral dying or just stressed?
Closed or retracted polyps and mild tissue recession are usually reversible stress signs once parameters are stabilized. Brown jelly slime and rapid tissue liquefaction, on the other hand, are true emergencies that need immediate action, not a wait-and-see approach.
Why is my candy cane coral not opening?
Most often it's unstable water parameters, too much flow or light, or a new pest. Check your water parameters first, then do a close visual inspection between polyp heads for anything that looks like a flatworm, nudibranch, or unusual snail.
Can candy cane coral recover from tissue loss?
Yes — given stable conditions and time, remaining healthy tissue can re-skin over exposed skeleton, typically over several weeks. However, sections of skeleton that are fully bare and disconnected from living tissue will not regrow on their own.
What does brown jelly disease look like and how fast does it kill?
It appears as a brown, gelatinous coating spreading across the polyps, and it can destroy an entire colony within a day or two if untreated. It requires immediate isolation, physical removal of the jelly, and an iodine dip — not gradual parameter fixes.
Why is my candy cane coral turning brown or losing color?
Turning dull brown is usually caused by insufficient light, which pushes the coral to increase its zooxanthellae population, sometimes worsened by high nutrients. This is distinct from bleaching, where too much light or heat causes the tissue to turn pale or white instead.
What flow and light does candy cane coral need?
Low-to-moderate, indirect flow paired with roughly 50–70 PAR is the safe baseline for troubleshooting. Both extremes — flow that's too strong or light that's too intense — cause different but equally damaging problems, as does too little of either.
Does candy cane coral need to be fed?
Not strictly, for basic survival, but target-feeding 2–3 times per week noticeably improves color, growth, and resilience against starvation-related tissue recession.
What pests attack candy cane coral?
Pests are uncommon overall, but watch for rust-brown flatworms, nudibranchs, and predatory or parasitic snails. A coral dip on arrival, plus regular flashlight inspections, catches most issues before they spread.
Ready to add a hardy LPS to your reef, or restock your quarantine kit? Browse candy cane and other LPS hard corals on FishyHub to find healthy specimens for your setup.

