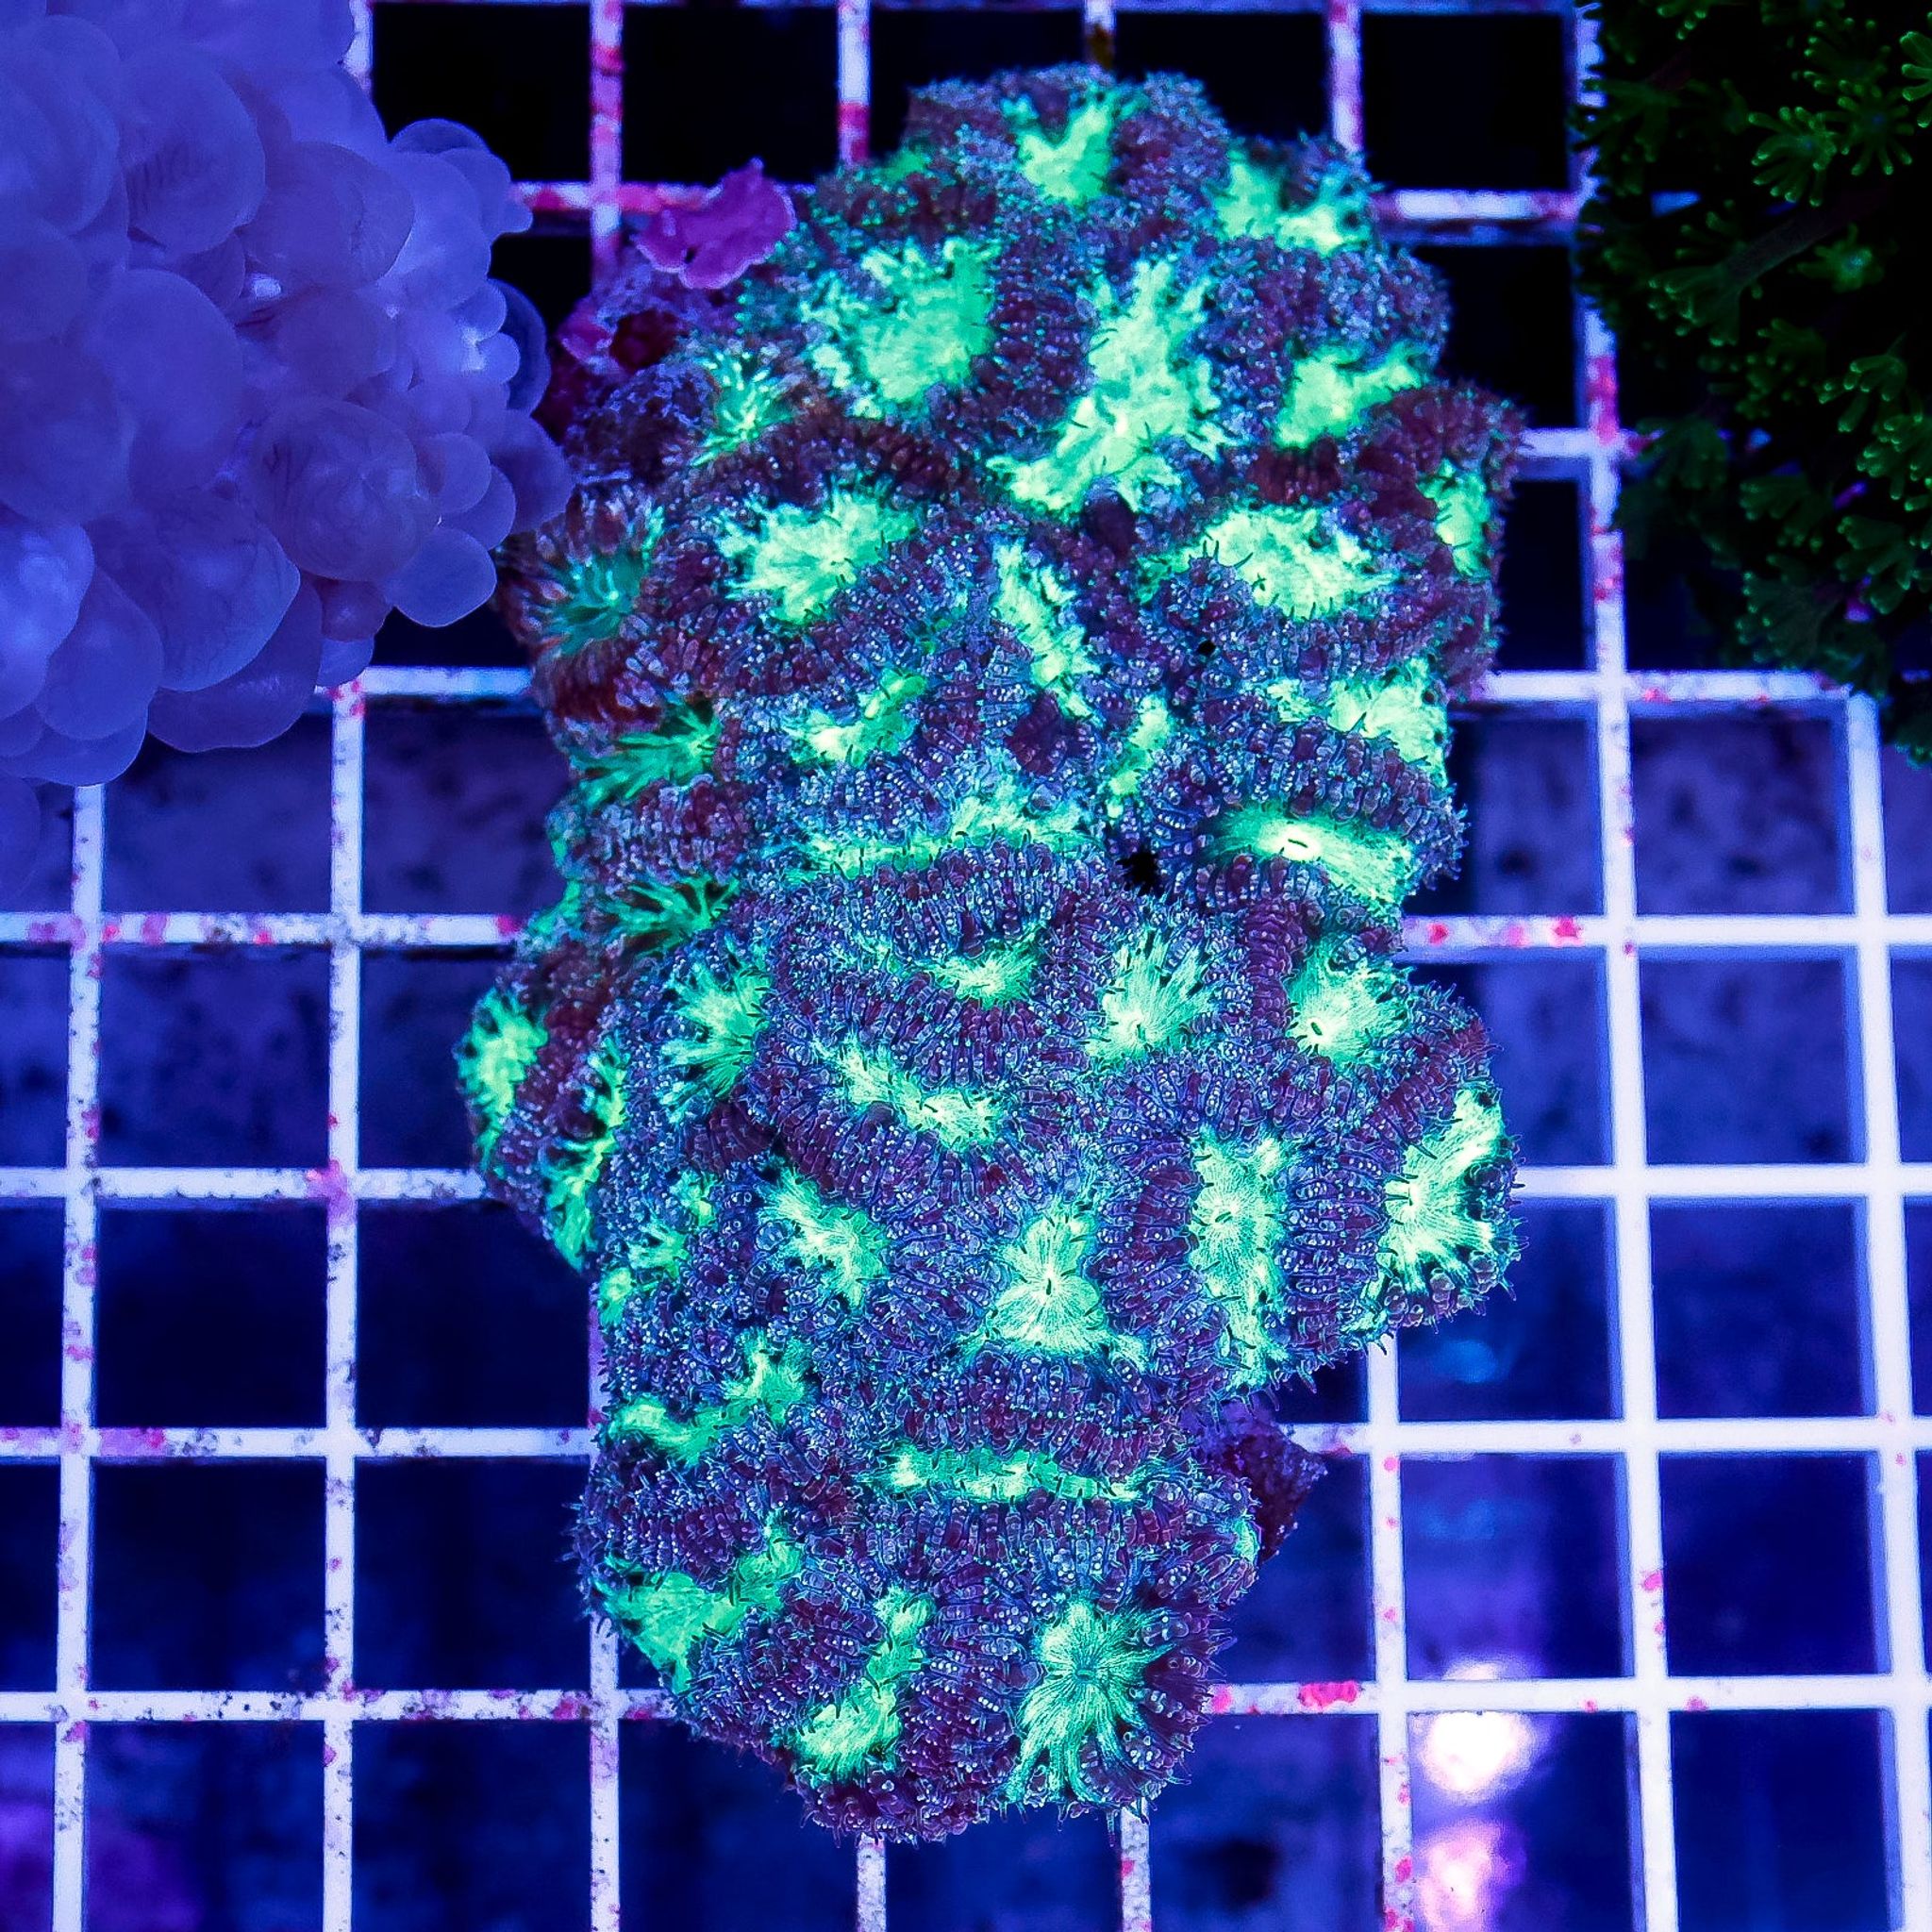
Best Placement for Blastomussa: PAR, Flow and Space Requirements
Blastomussa is a large-polyp stony (LPS) coral built for shade, not spotlight positions, so the single biggest placement mistake is putting it up high "to be safe." The short answer: lower-to-mid rockwork, partial shade, 50–150 PAR, gentle indirect flow, and several inches of breathing room from neighbors. Here's how to translate that into an actual spot in your tank.
Why Blastomussa Needs a Different Spot Than SPS
Blastomussa comes from outer reef slopes, walls, caves, and areas under ledges — habitats defined by reduced light and calm, filtered water movement rather than open, sun-blasted flats. That native niche is why it behaves differently than small-polyp stony (SPS) corals, which expect bright, high-flow water near the surface.
There are two commonly kept species, and the difference matters when you're deciding where each goes:
- Blastomussa merletti — smaller, rounder polyp heads, tends to form tighter, denser colonies.
- Blastomussa wellsi — larger, more oval-shaped heads, often shows bolder color patterning per polyp.
Both share the same low-light, low-flow preference, so species doesn't change your PAR target much — but wellsi's bigger, fleshier heads are slightly more visible when stressed (they show recession and paling faster), so it's a useful early-warning coral if you're unsure whether a spot is too bright.
PAR Target: The 50–150 Range, With a Caveat
Most healthy Blastomussa placements fall between 50 and 150 PAR, with many keepers reporting the best color and steady growth around 75–100 PAR. Outside that band:
- Under ~50 PAR: growth slows and colors can look dull or washed out over time.
- Above ~150–200 PAR: risk of bleaching climbs, especially for a coral that was shipped or farm-raised under lower light.
Sources don't fully agree on where the ceiling sits — some cap it at a tighter 50–100 PAR "safe zone," others say fully acclimated, well-fed colonies tolerate up to 150–200 PAR without issue. Treat 50–150 PAR as the working band rather than a hard rule, and let the coral's own response (polyp extension, color, tissue condition) guide fine-tuning above that range instead of chasing a specific number.
It's PAR at the Coral, Not the Fixture, That Counts
Whether you're running LED, T5, or metal halide, the fixture type and wattage tell you almost nothing about what the coral is actually receiving. A powerful light dimmed and raised can land well inside the safe zone, while a "gentle" LED mounted close and run at full intensity can bleach a Blastomussa just as fast as a halide would. Use a PAR meter or a manufacturer's PAR chart for your specific fixture and mounting height — don't assume any light source is automatically LPS-safe just because of its category.
Where in the Tank to Place It
Aim for the lower third to middle of the water column, in a spot that's shaded rather than sitting in the direct light cone. Good options include:
- Under a rock overhang or ledge
- Behind taller rockwork, out of the main beam
- Off to the side of the tank rather than dead-center under the fixture
Avoid the "prime real estate" at the top of the rock structure — that space is better reserved for SPS and other high-light corals, and placing Blastomussa there is the most common reason keepers see bleaching within days to weeks.
Translating This to Common US Tank Sizes
Generic PAR numbers are only useful once you connect them to a fixture height and tank depth you can actually adjust. As a rough starting point for typical reef setups:
| Tank size | Typical water depth | Where to start Blastomussa | Adjustment lever |
|---|---|---|---|
| 40-gallon breeder (36" × 18" × 16") | ~16 in (41 cm) | Lower third, shaded by rock | Raise fixture or dim rather than move higher |
| 65–75-gallon reef | ~20–24 in (51–61 cm) | Mid-to-lower rockwork, side of tank | Use a PAR meter at that depth before committing |
| 90–120-gallon reef cube | ~24–30 in (61–76 cm) | Lower third, behind or under an overhang | Even bright fixtures often read low-light at the sand bed |
Two variables that are easy to overlook: tank depth naturally attenuates light (a foot of extra water column can cut PAR substantially), and a cover glass or lid — especially one with salt creep or scratching — can meaningfully reduce the light reaching a shaded lower-tank spot even when the fixture's rated output looks fine on paper. If a "shaded" placement is still reading high on a meter, check the glass before assuming the fixture itself is the problem.
Flow: Gentle and Indirect, Not Stagnant
Guidance on flow varies by source — some say low flow only, others recommend low-to-medium indirect flow. The more useful framing is this: the flow's character matters more than its raw strength. Turbulent, randomized movement (from a wavemaker or the natural chop of multiple pumps) is fine and even beneficial. A direct, laminar blast from a single powerhead aimed at the coral is what causes problems.
- Too little flow: detritus and a red or brown film (cyano or nuisance algae) can settle directly on the polyps.
- Too much direct flow: chronic tissue retraction, thinning at the polyp base, or full tissue recession over weeks.
If you notice a film building up on the polyps in one specific spot, that's a signal flow is too low at that location — reposition a return outlet or add gentle circulation nearby rather than cranking flow tank-wide.
Spacing: Give It Room to Breathe (and Sting)
Blastomussa polyps expand substantially at night and extend sweeper tentacles that can sting slower-growing or sessile neighbors — this is especially relevant for other LPS, zoanthids, and soft corals nearby. Recommendations across sources range from 2 inches up to 6 inches; a practical middle ground is:
- Minimum 3–4 inches (7.5–10 cm) clearance on all sides from the nearest coral.
- More space for fast growers or larger colonies, since heads multiply and the colony base widens outward over time.
Check spacing again as the colony matures — a frag that started with generous clearance can outgrow it within a year or two.
Mounting
Frags and small colonies do best epoxied or glued (reef-safe cyanoacrylate or a two-part epoxy) onto a flat, stable ledge rather than a sloped or crumbly surface. Larger colonies can simply sit loose in a rock depression, which also makes repositioning easier during acclimation. Either way, leave open rock space around the mounting point — the colony will expand laterally, and encroaching on a neighbor's space later means moving a coral that's now attached and established.
Feeding: Not Required, But It Helps
Blastomussa can survive on light and photosynthesis alone, but its large, fleshy polyps are efficient at capturing meaty foods, and direct feeding 1–3 times per week — mysis shrimp, chopped seafood, or a coral-specific pellet — noticeably improves growth rate and color saturation. This is a useful lever if you're keeping the coral on the lower end of its PAR range: feeding can help offset reduced light energy. You can browse target-feeding foods and coral-specific pellets in FishyHub's freeze dried food selection.
Water Parameters
Blastomussa isn't unusually fussy about chemistry once light and flow are dialed in. Standard reef-tank targets apply:
| Parameter | Target range |
|---|---|
| Salinity | ~1.025 SG |
| Temperature | 76–80°F (24–27°C) |
| pH | 8.0–8.4 |
| Alkalinity | 8–11 dKH |
| Calcium | 380–450 ppm |
| Magnesium | 1250–1350 ppm |
It fits well in mixed reef, LPS-dominant, and even some soft-coral tanks, but doesn't do well directly under aggressive SPS-grade lighting without deliberate shading.
Acclimation: A Step-by-Step Schedule
Blastomussa is noticeably more light-shock sensitive than many other LPS. The rule of thumb — a PAR jump of more than roughly 30–50% in a single move is the main trigger for bleaching — is easier to follow with an actual schedule rather than a vague "go slow":
- Week 1: Place new frags or colonies at the lowest, shadiest position you're considering — well below your eventual target PAR.
- Week 2: If polyps are extending well and color looks stable, move up slightly (a few inches, or raise the fixture height a notch).
- Weeks 3–4: Continue in small increments, watching polyp extension and color after each move, and pause or step back down if you see paling or prolonged retraction.
- After week 4: Once settled at the final spot within the 50–150 PAR band, monitor monthly rather than daily — this is also the point to reassess spacing as the colony fills out.
This applies just as much when moving an established colony to a brighter or higher-flow spot after a frag swap or tank upgrade — treat it as a fresh acclimation, not a simple relocation.
Common Mistakes and Troubleshooting
- High placement "to be safe from flow." This is the top cause of bleaching and paling within days to weeks. Default to lower and shadier first, then adjust up gradually.
- Direct powerhead blast. Aiming a pump straight at the coral causes chronic retraction, base thinning, or recession over weeks — reposition the pump or add a diffuser instead.
- Placing colonies too close together. Nighttime sweeper tentacles can kill neighboring tissue at the contact point; recheck spacing as colonies grow.
- Skipping acclimation after a move. Sudden PAR increases above the ~30–50% threshold are the main bleaching trigger — always step up gradually.
- Confusing daytime retraction with unhappiness. Blastomussa often extends most fully at night or under actinic-heavy lighting; judge health over days, not hours.
- Brown jelly disease after physical damage. Following an injury or prolonged stress from excess flow or light, isolate the colony and remove or frag away affected tissue promptly — it can spread to healthy heads if left alone.
- Algae or cyano film on the polyps. This points to insufficient flow at that specific spot, not a tank-wide flow problem — improve circulation locally rather than raising overall flow.
If you're shopping for a specimen to place using this guide, FishyHub's LPS hard corals category is a good place to compare available frags and colonies before deciding on a spot.
Frequently Asked Questions
Can Blastomussa go in a low-tech or beginner reef tank?
Yes. Its shade-loving nature makes it one of the more forgiving LPS choices for lower-light setups, since it doesn't need the intense lighting many SPS corals require.
Does Blastomussa need direct feeding to survive?
No — it can survive on light and photosynthesis alone. Target feeding meaty foods a few times a week is optional but noticeably improves growth and color over time.
Can it be kept under LED-only lighting?
Yes, as long as the intensity at its position is dialed down through dimming, mounting height, or shading to land in the 50–150 PAR range. Spectrum type matters far less than the measured PAR reaching the coral.
Why did my Blastomussa's colors fade after I moved it?
Almost always a lighting change that happened too fast. Move it back to a shadier spot and reacclimate gradually using small, incremental steps over several weeks.
How close can I place Blastomussa to other corals?
Keep at least 3–4 inches of clearance minimum, more for fast-growing neighbors or larger colonies. Recheck spacing periodically as the colony matures, since sweeper tentacle reach increases with size.
Is strong flow ever beneficial for Blastomussa?
Mild-to-moderate indirect or turbulent flow helps prevent detritus and disease-causing buildup on the polyps. Direct, strong current is harmful — the goal is gentle water movement, not stillness or a direct blast.
What does bleaching vs. normal polyp retraction look like?
Bleaching is a lasting loss of tissue color, sometimes showing the white skeleton underneath, that persists over days. Normal retraction is temporary polyp shrinkage — often from daytime light or minor disturbance — that resolves within hours.
Ready to find your next specimen? Browse FishyHub's full corals selection to compare LPS options suited to a shaded, low-flow spot in your reef.

